Trying to enter the Fallen Emperor in ARC Raiders, but can't open its door or survive the puzzles inside? You need an Emperor Gateway Conduit, a solid loadout, and a plan for the changing dungeon rooms. This guide covers the key, every major puzzle, the final loot chamber, and how to extract with Emperor Modulators and Amplification Modules.
What Is the Fallen Emperor Dungeon in ARC Raiders?
The Fallen Emperor is a huge crashed ARC machine in western Pendola Pass, added with the Frozen Trail update. Unlike a normal ARC boss, this Emperor is already down. The challenge is entering its body and crossing a series of dangerous rooms to reach the stored technology inside.The dungeon contains electrical traps, moving platforms, crushing walls, laser hazards, and Hydra turrets. It is also one of the main places to find Amplification Modules. The Emperor Modulator found there is needed to upgrade your Gunsmith to Level 4, an important step toward ARC Raiders Amplified Weapons.
Quick answer: Get an Emperor Gateway Conduit, open the round hatch beneath the Fallen Emperor, survive the puzzle rooms, then search the final chamber's wall containers. Bring a safe-pocket augment so you can protect the rare loot you find.
How to Get the Emperor Gateway Conduit Key
The Emperor Gateway Conduit is a Legendary key item used to unlock the dungeon entrance. To craft one yourself, you must learn its blueprint and collect three different ARC Couplers during the Redirection map condition on Pendola Pass.1. Find a Damaged Emperor Relay During Redirection
Select Pendola Pass when the Redirection map condition is active. Look for Damaged Emperor Relays around the map. When a relay activates, its beam turns red and points into the sky, making it easier to find from a distance.Relays may activate later in the raid, so watch the map and keep enough time to reach one. Other players can see the same beam and may arrive before you do.
2. Deploy an Emperor Beacon and Loot the Harvester Payload
Search an active relay to collect an Emperor Beacon. Move to a clear space with room for the incoming payload, deploy the beacon, and immediately take cover. Falling ARC debris can damage your health and shield before the main payload lands.Once the debris stops, find the large upright Harvester Payload and use its breach-and-search interaction. This is the main container to check for the key blueprint and couplers. The smaller pieces scattered nearby are useful for other ARC materials, but should not be your first stop when farming the Conduit.
Beacon tip: Use the Emperor Beacon in the raid where you find it. Extracting with an unused beacon can turn it into a Ruined Emperor Beacon rather than saving it for another payload run.
3. Collect the Blueprint and All Three ARC Couplers
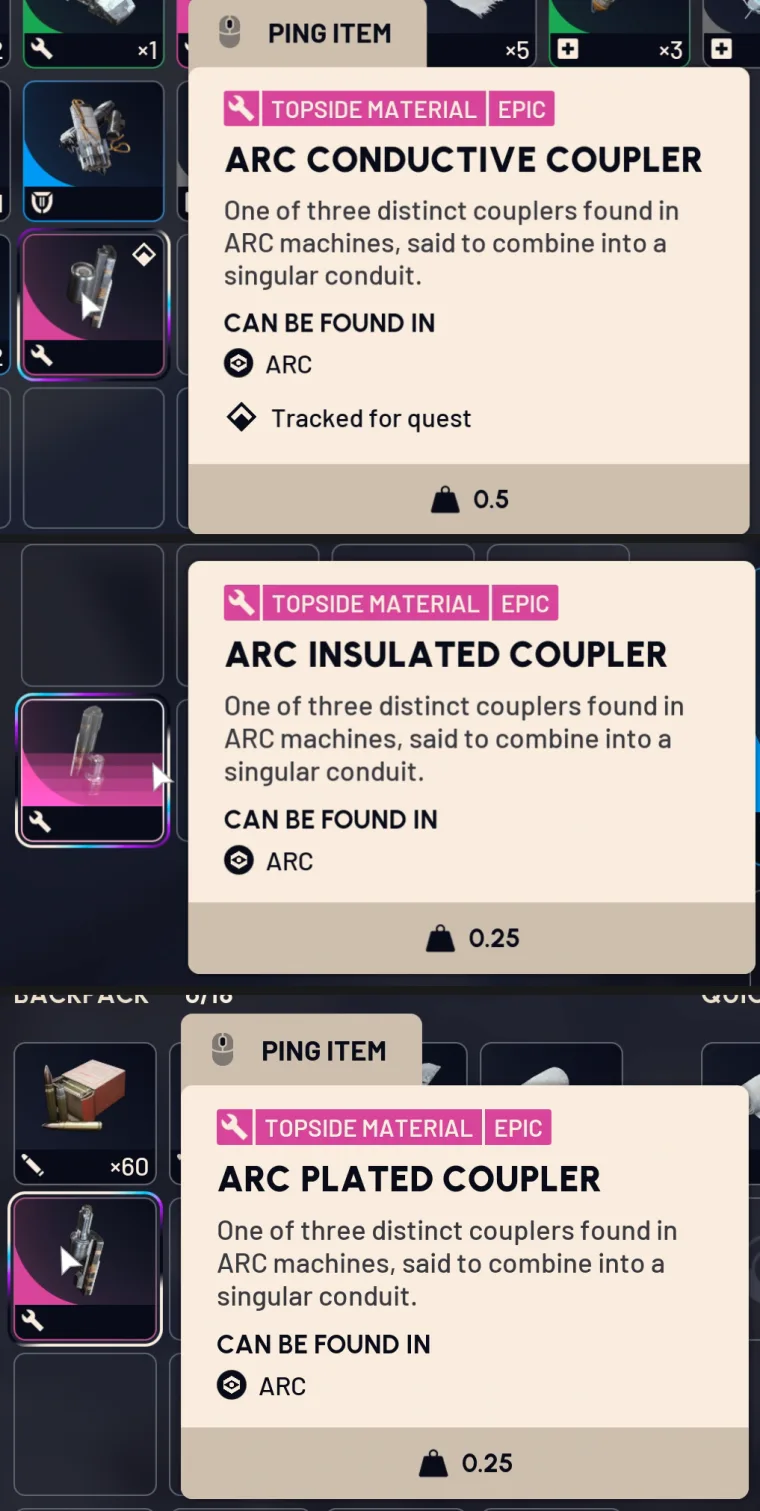
The Emperor Gateway Conduit Blueprint is a chance drop, so one payload may not be enough. While searching, keep one of each required material:- 1 ARC Conductive Coupler
- 1 ARC Insulated Coupler
- 1 ARC Plated Coupler
Save the rare blueprint in a safe pocket as soon as you find it. Some players have also reported blueprint drops from Surveyor loot, but Redirection payloads are the more clearly documented farming route.
4. Craft the Emperor Gateway Conduit at Workbench I
Extract to Speranza, learn the blueprint, and use your basic Workbench to craft the Conduit. The recipe does not require an upgraded Gunsmith or Research Station.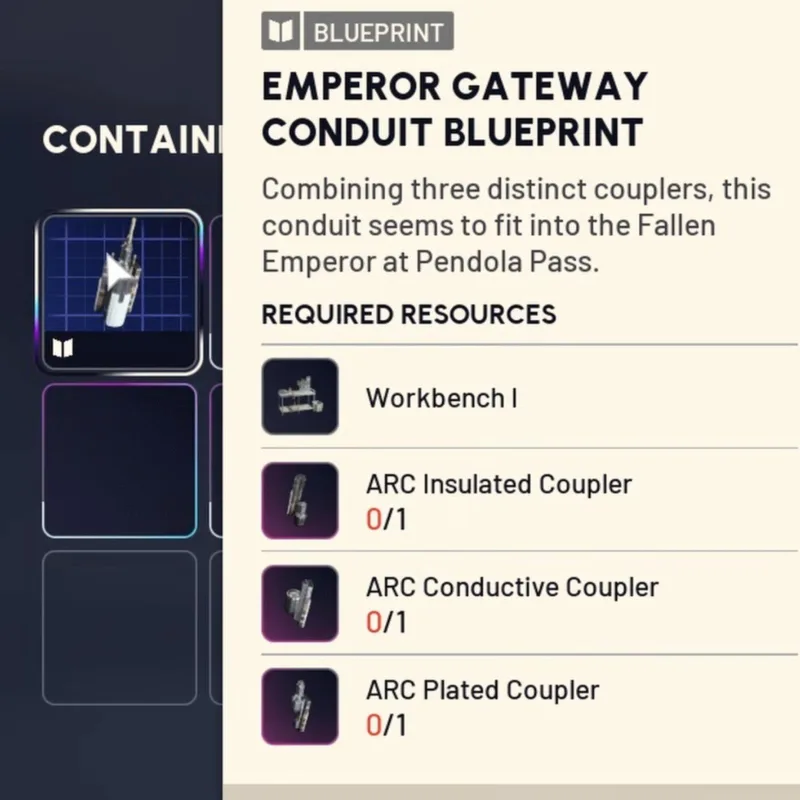
| Crafting Requirement | Amount | Where to Get It |
|---|---|---|
| Emperor Gateway Conduit Blueprint | Learn once | Chance drop from Redirection Harvester Payloads |
| ARC Conductive Coupler | 1 | Redirection Harvester Payloads |
| ARC Insulated Coupler | 1 | Redirection Harvester Payloads |
| ARC Plated Coupler | 1 | Redirection Harvester Payloads |
| Crafting Station | Workbench I | Your Workshop in Speranza |
The Frozen Trail Reward Pass also lists a completed Conduit among its later rewards. That gives you a key without farming the blueprint, but learning the blueprint is more useful if you want repeat dungeon runs.
Where Is the Emperor Dungeon Entrance?
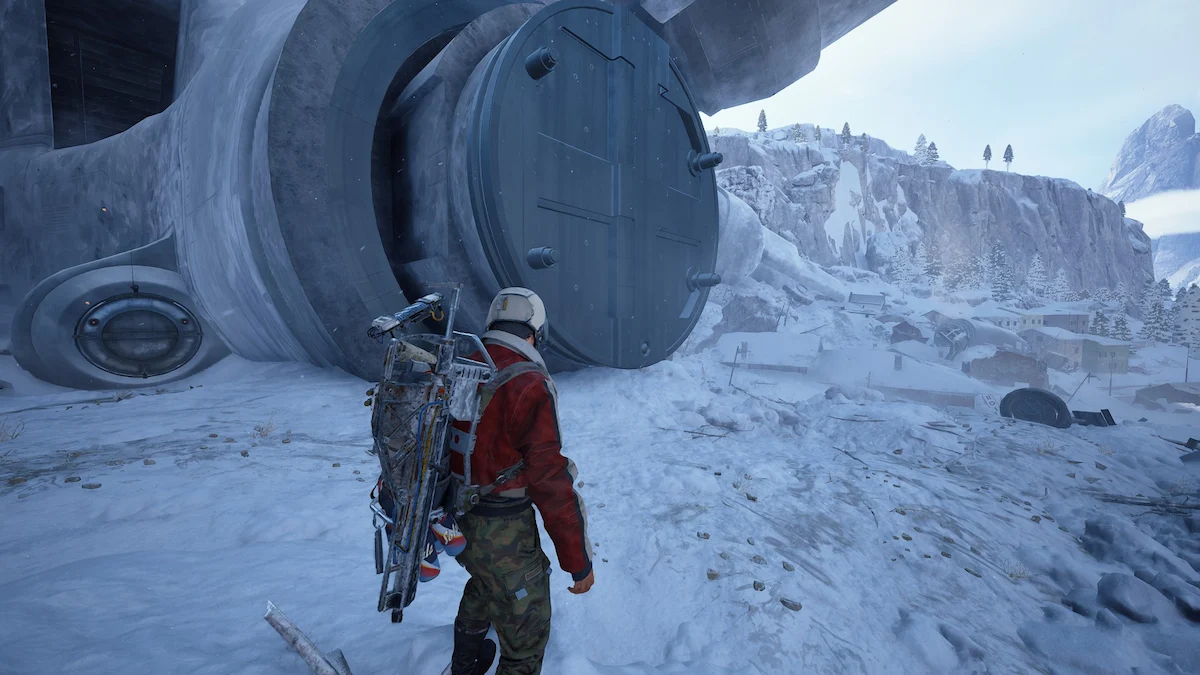
The Fallen Emperor is in the western part of Pendola Pass, near Piazza della Rupe and Almatera Station. Head toward the giant wreck and look around the base of its body, beneath the massive legs and surrounding debris.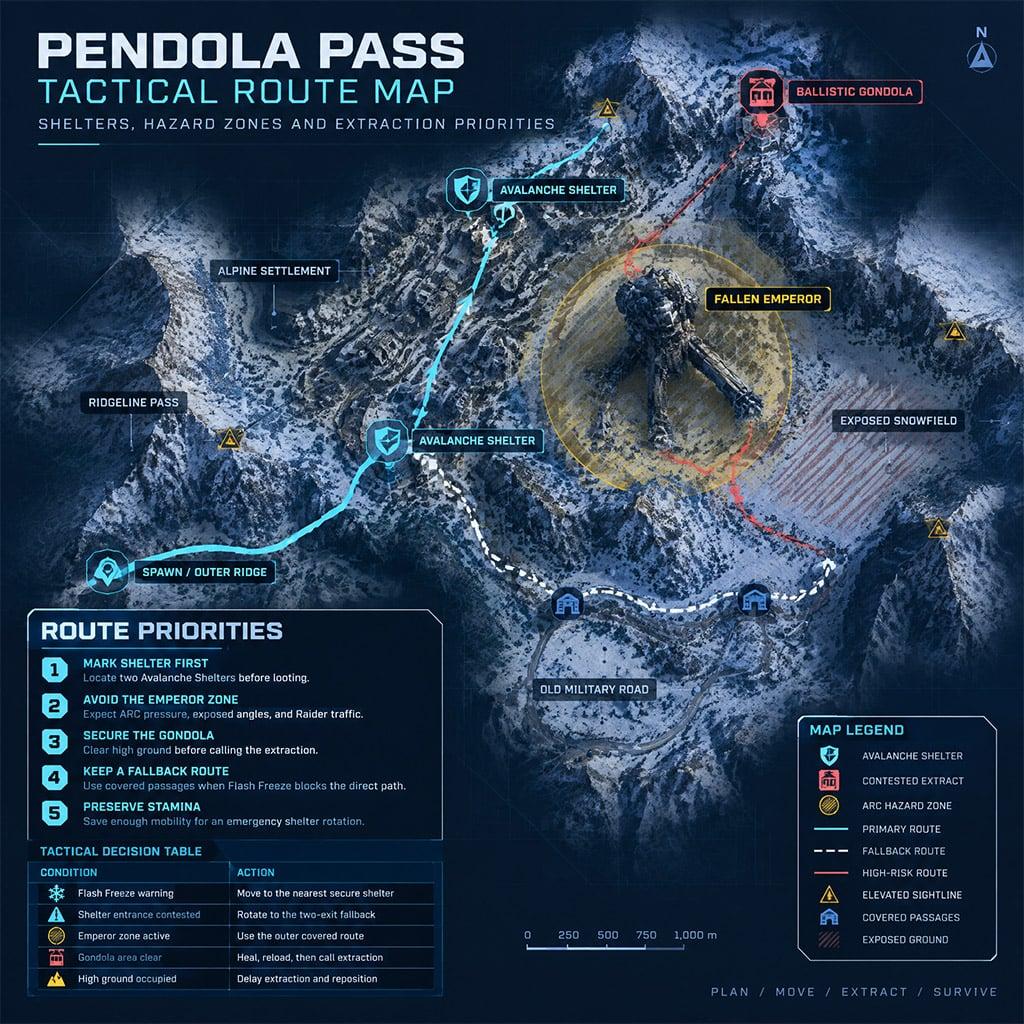
The entrance is a large circular hatch with an interaction panel beside it. Bring a crafted Emperor Gateway Conduit in your inventory and interact with the lock to open the doorway. The key is used when the gateway opens, so bring another on a later run if the entrance is closed again.
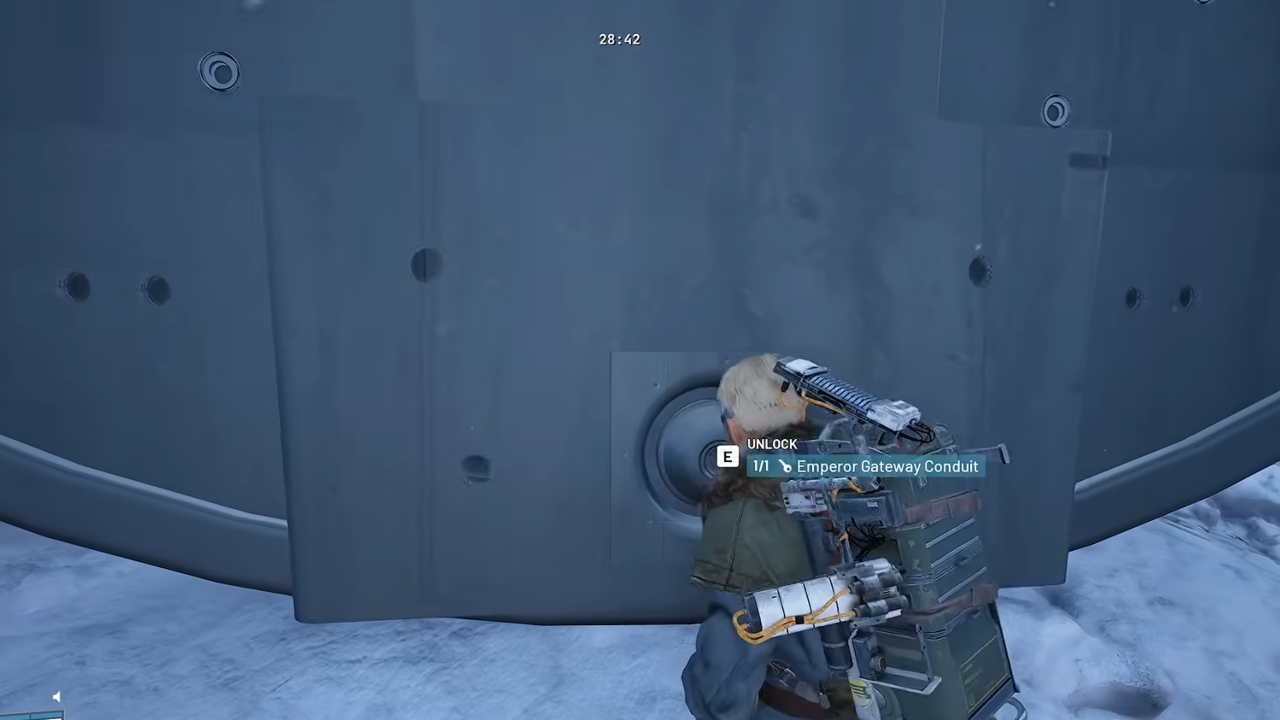
You do not have to farm the key during the same raid in which you enter. The Redirection condition is used to gather the materials; the dungeon can be opened on a later Pendola Pass visit. If another player has already unlocked the hatch, you may be able to follow them in without using your own key.
Before entering: Check the raid timer, listen for nearby Raiders, and decide which Ballistic Gondola you will use afterward. The nearby Reckless Transceiver is convenient, but its position can leave you exposed when you return with loot.
Best Loadout for the Emperor Dungeon
A good Emperor loadout is built around movement, fighting ARC, and carrying rare items out. You do not need the most expensive weapons in the game, but a mobility tool and enough healing will make your first clear much easier.| Equipment | Recommendation | Why Bring It? |
|---|---|---|
| Snap Hook | Strongly recommended | Cross gaps, avoid crushers, and reach high exits more quickly. |
| Grappling Hook | Alternative or backup | Useful for climbing vertical shafts and bypassing some jumps. |
| Hullcracker | ARC combat weapon | Effective against Hydra turrets and other tough ARC enemies. |
| Anvil or Renegade | Accurate second weapon | Hit distant yellow puzzle nodes and deal with smaller ARC. |
| Healing and Shield Rechargers | Essential | Recover from lasers, falls, electricity, and turret fire. |
| Stamina consumables | Helpful | Give you extra room for error in the gas and crusher sections. |
| Looting augment with Safe Pockets | Top priority | Protect Emperor Modulators and high-value Modules if the run goes wrong. |
The Snap Hook is not a formal entry requirement, but it can save an entire run in the crusher, Hydra, and vertical platform rooms. If you bring a Grappling Hook instead, learn its movement limits before entering the dungeon.
Leave some inventory space open. There are containers throughout the route, and a full backpack makes it harder to grab the best items in the final chamber.
ARC Raiders Emperor Dungeon Puzzle Walkthrough
The first corridor and the final loot chamber follow a recognizable pattern, but the rooms between them can appear in different orders or layouts. Do not rely on a single memorized route. Learn what each room asks you to do, then follow the available door toward the next challenge.Patch 2.1.0 door fix (October 13): Embark fixed unintended interactions between throwables and certain doors inside the Emperor. Older videos may show door shortcuts that no longer work. Use the intended switches, yellow nodes, and door interactions instead. See the official patch notes.
Emperor Dungeon Video Walkthrough
Watch this playthrough alongside the steps below to see the dungeon rooms and puzzle hazards in action.1. Entrance Corridor: Disable the Electric Traps
Your first challenge is a snowy corridor with electrified ARC equipment and a Hydra guarding the route. Avoid brushing against active machinery. Shoot the glowing electrical boxes to make them safe for a short time, then move past before they recharge.Use cover against the Hydra and destroy it with your ARC-focused weapon. Once the path is clear, continue into the central elevator area.
2. Electric Elevator: Shoot the Yellow Power Nodes
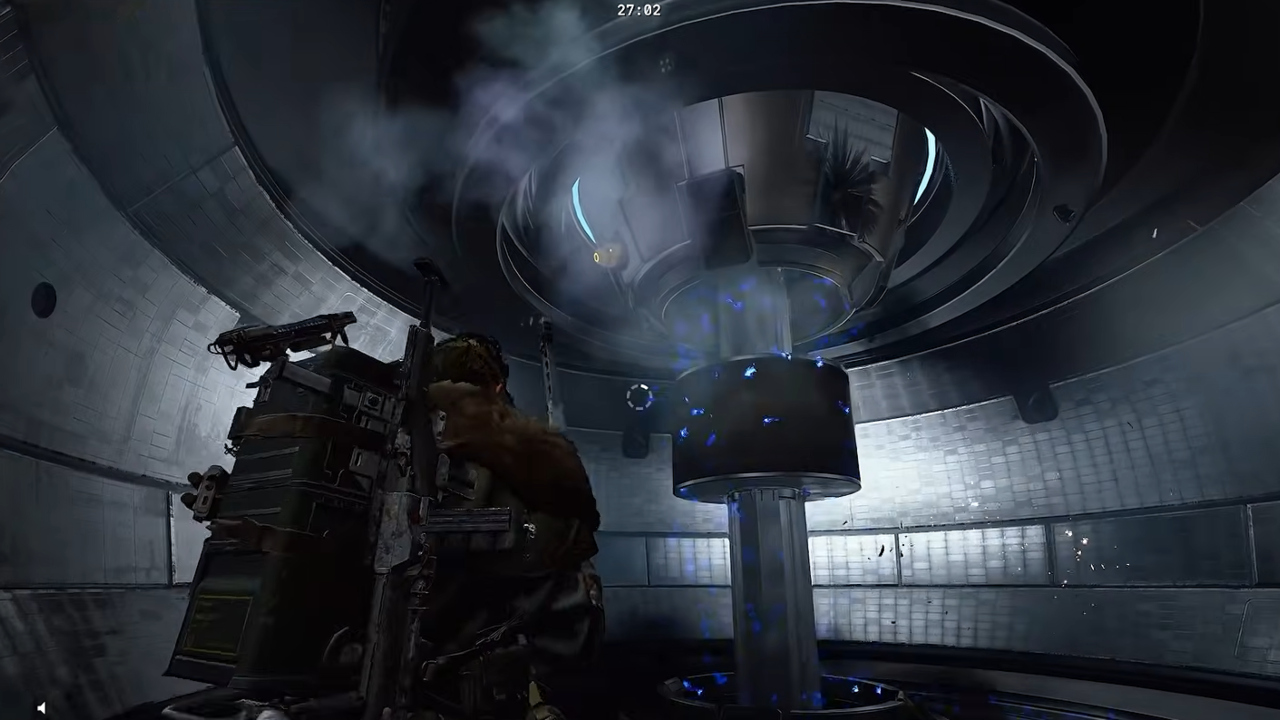
The elevator is powered by several yellow weak points on its center mechanism and the surrounding walls. Look around the full shaft, including above and below your position, before assuming you have destroyed them all.Shoot the visible nodes to disable the electrical hazards and activate the moving platform. Ride the mechanism and move to the next level when you have a safe opening. Search reachable round loot panels along the way, but do not fall behind the lift while it is moving.
3. Moving Pillars: Create a Path Upward
One possible trial contains tall pillars that rise toward the ceiling. Spot the yellow weak points on the machinery and shoot them to change the pillar positions. Move onto the lowered section before it lifts you toward the next platform.Wait until the pillar is stable before jumping. A Snap Hook can help you recover from a missed jump or reach a higher platform without repeating the whole movement cycle.
4. Poison Gas and Crushing Walls
The crusher room combines moving walls with gas that drains your stamina. Entering the active area can start the mechanism, so study the safe spaces before running in.- Watch one full wall movement to learn when it opens and closes.
- Use the lower recesses or safe gaps to avoid the moving parts.
- Cross when the walls pull apart, instead of sprinting straight into a closing gap.
- Use the Snap Hook to reach the far ledges if you cannot safely cross on foot.
- Climb the platforms beyond the crusher to reach the next door.
Gas makes long sprints risky. If your stamina is low, wait in a protected recess for the next opening rather than forcing the crossing.
5. Maze Rooms: Find the Nodes or the Open Door
The Emperor can give you different maze layouts. In one version, you need to clear enemies and shoot yellow nodes to open the way forward. In another, the solution is simply finding the unlocked round door among the partitions.Small ARC enemies, including Pops and Fireballs, can move through the room and interrupt your search. Deal with nearby enemies first, check the outer walls, and avoid wasting time trying to unlock doors that are only scenery.
Maze tip: If you cannot find more yellow nodes, stop and test the doors. You may be in the layout where no additional node puzzle is required.
6. Vertical Shafts and Moving Containers
Several rooms ask you to climb through tall shafts using ladders, moving containers, and narrow ledges. Some containers carry an electrical charge. Shoot an energized box before landing on it, and cross quickly before it powers back up.A different shaft has a container that moves up and down like a lift. Step onto it while it is within reach, ride it toward the next ledge, then jump or grapple across to the ladder. When the route goes downward, drop one level at a time to avoid heavy fall damage.
7. Rotating Laser Corridors
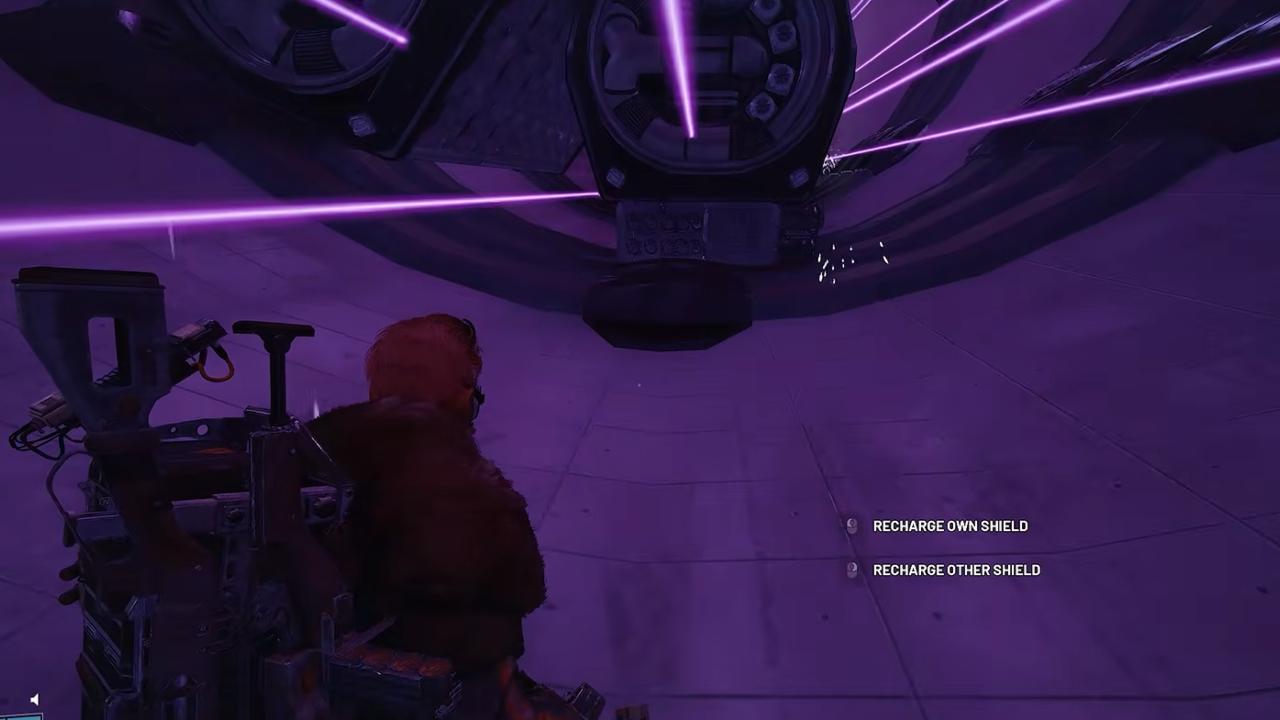
Purple laser beams sweep through narrow chambers and can remove a large amount of health. Some versions offer a central obstacle or shallow floor recess you can crouch behind. Others require you to watch the movement pattern and cross between laser passes.Keep your shield charged, then cross one safe section at a time. Crouch behind solid cover when the laser passes overhead and save the Snap Hook for the last gap if needed. Do not stand in the open while searching nearby containers.
8. Hydra Rooms and Dangerous Loot Containers
Some large rooms contain multiple Hydra turrets watching the moving platforms or Harvester Payload racks. You may enter from above or below depending on the route. Stay behind cover, avoid activating several Hydras at once, and use a Hullcracker to remove any turret blocking your exit.You do not always need to destroy every enemy. If the way forward is open, a quick grapple to the exit may be safer than an extended fight. Check the nearby containers only when you have a safe route back to cover.
Be careful with orange or red loot pods. Some begin a delayed explosion after being breached. Take the most useful items first, then move away instead of trying to empty every slot while the container flashes.
How to Unlock the Final Emperor Loot Room
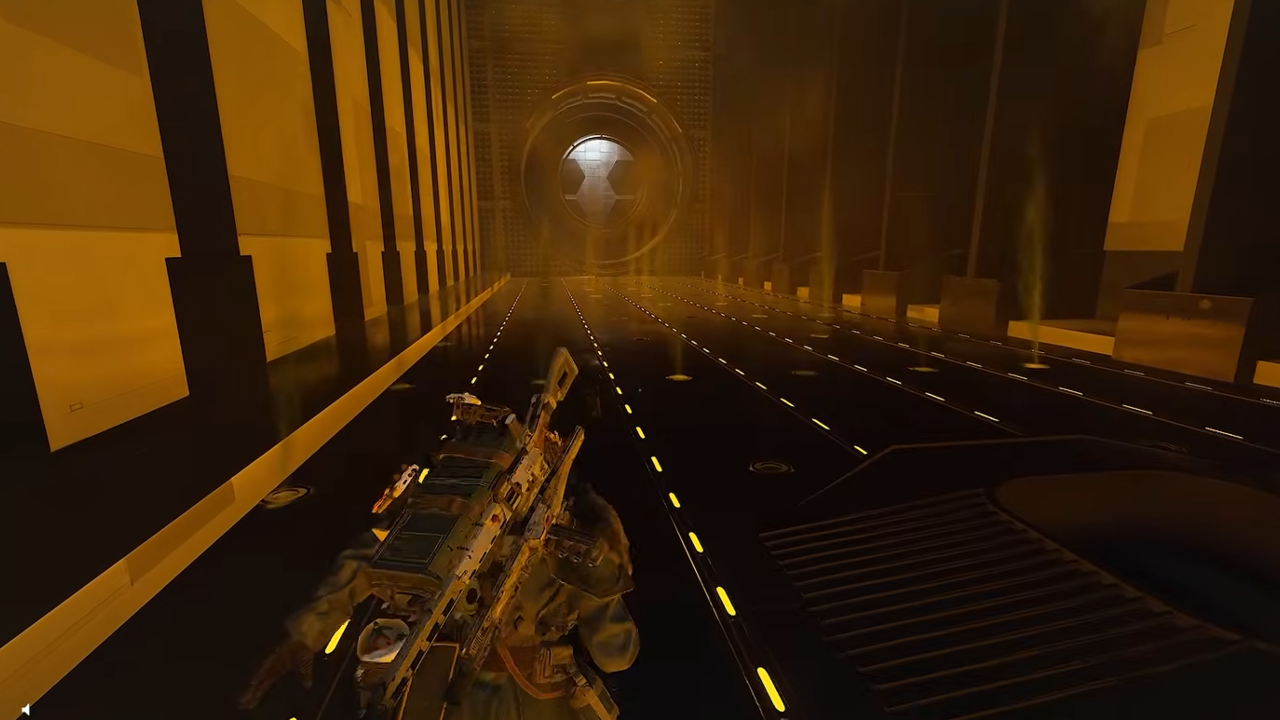
The last major chamber is a large hangar filled with ARC payload containers. As you enter, look for the main opening ahead rather than following a yellow-lit side door that can lead back toward the starting area.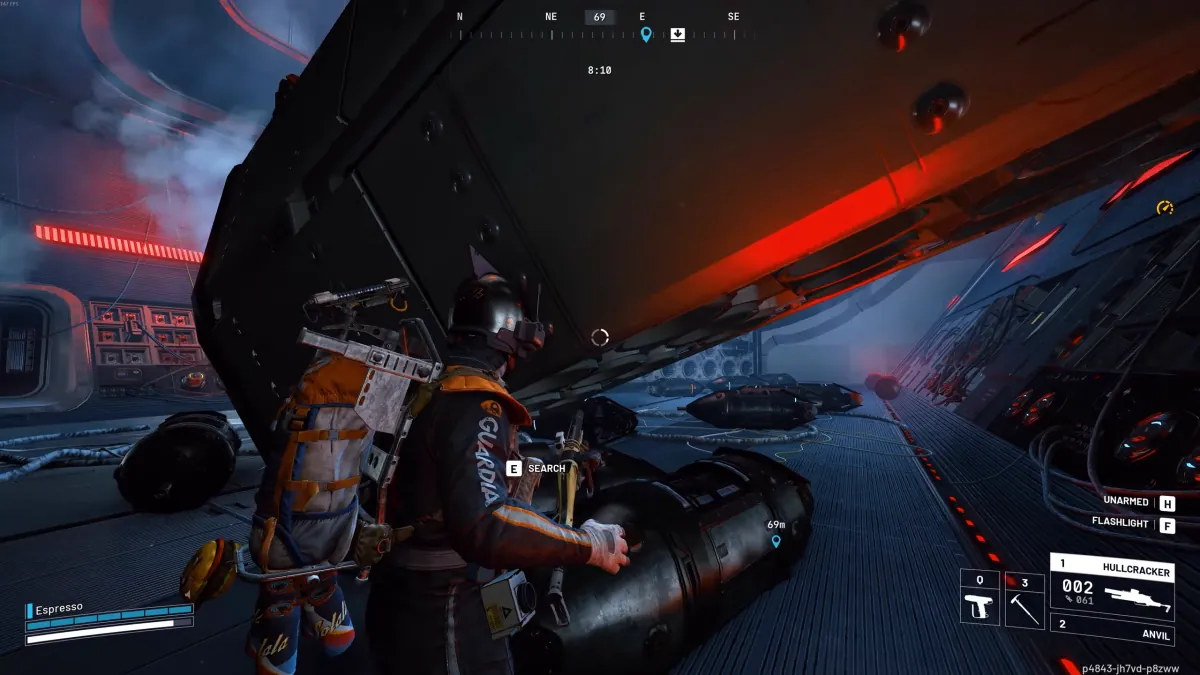
Reach the chamber floor using the moving machinery and the available ledges. Watch the large entrance: crossing into the chamber can bring in ARC reinforcements, and the encounter may include a dangerous Vaporizer.
Disable the Six Yellow Wall Nodes
There are three yellow weak points on each side of the hangar, for six in total. Shoot all six to unlock additional wall containers and expose more loot racks. Depending on the stage of the encounter, the roof opens and ARC enemies can enter the area.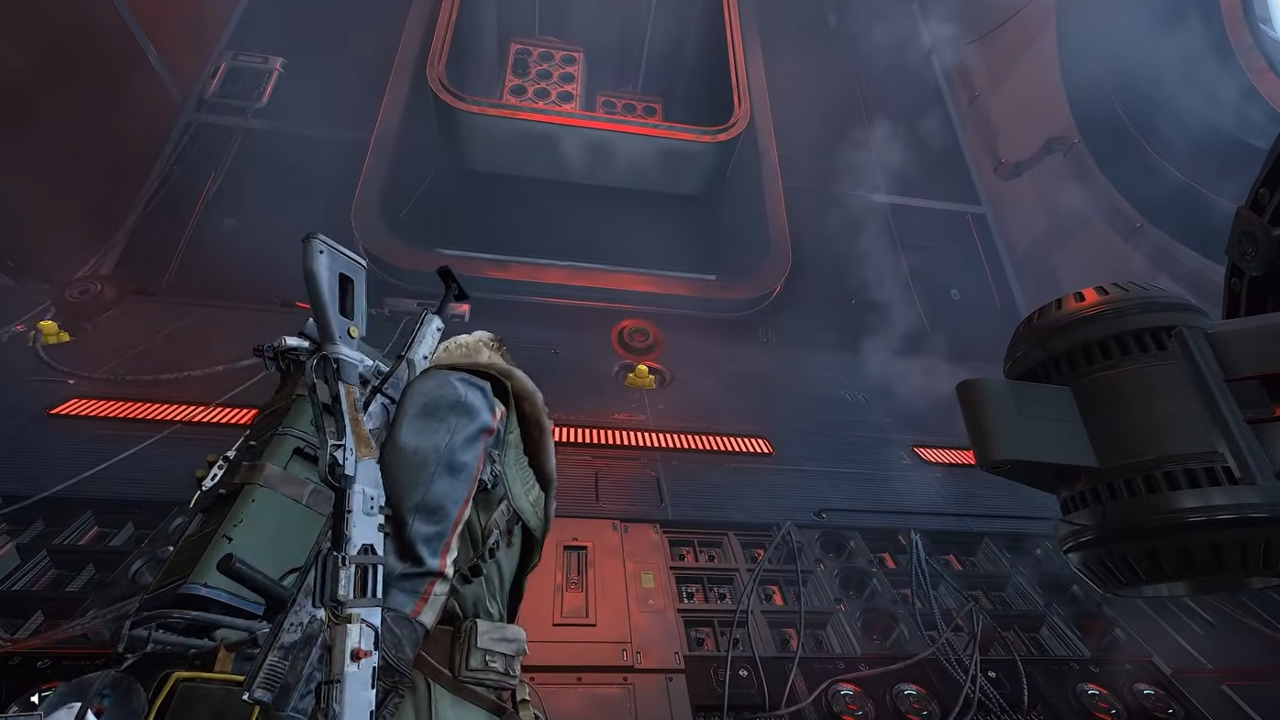
You have two workable approaches:
- Fight: Clear the most dangerous enemies first, then search the wall caches without constant pressure.
- Hide: Take cover under the damaged containers, avoid drawing attention, and wait for the airborne enemies to move away before looting.
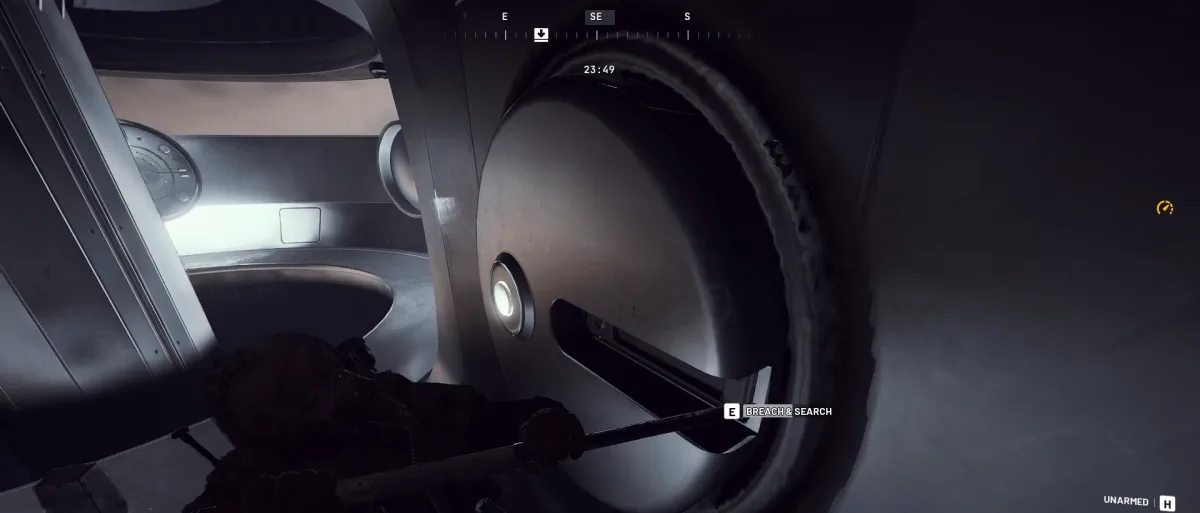
Search the newly opened side racks as well as the containers already visible on the floor. These extra caches are an important reason to finish the node puzzle instead of grabbing the first item and leaving.
All Emperor Dungeon Loot and Rewards
The Emperor is valuable because it contains materials used for the new Amplification system, especially the Legendary Emperor Modulator. Loot is not identical on every run, and exact drop rates have not been confirmed, so search multiple containers before deciding a run was unsuccessful.| Reward | What It Is Used For | Where to Look |
|---|---|---|
| Emperor Modulator | Legendary material required for the Gunsmith Level 4 upgrade. | Final loot chamber and special dungeon containers. |
| Amplification Modules Mk. I–V | Rarity-matched modules used to Amplify supported weapons. | Breachable wall panels, payload racks, and loot containers. |
| Amplification crafting resources | Parts used in advanced weapon progression and research. | ARC technology containers throughout the route. |
| ARC Data Modules and other ARC parts | Materials for crafting and research-related progression. | Available ARC containers; exact contents vary. |
What Is the Emperor Modulator Used For?
You need one Emperor Modulator, three Radial Presses, and three Magnetic Accelerators to upgrade your Gunsmith from Level 3 to Level 4. This upgrade is part of the path toward Amplified Weapons. Keep the first Modulator you find instead of selling it.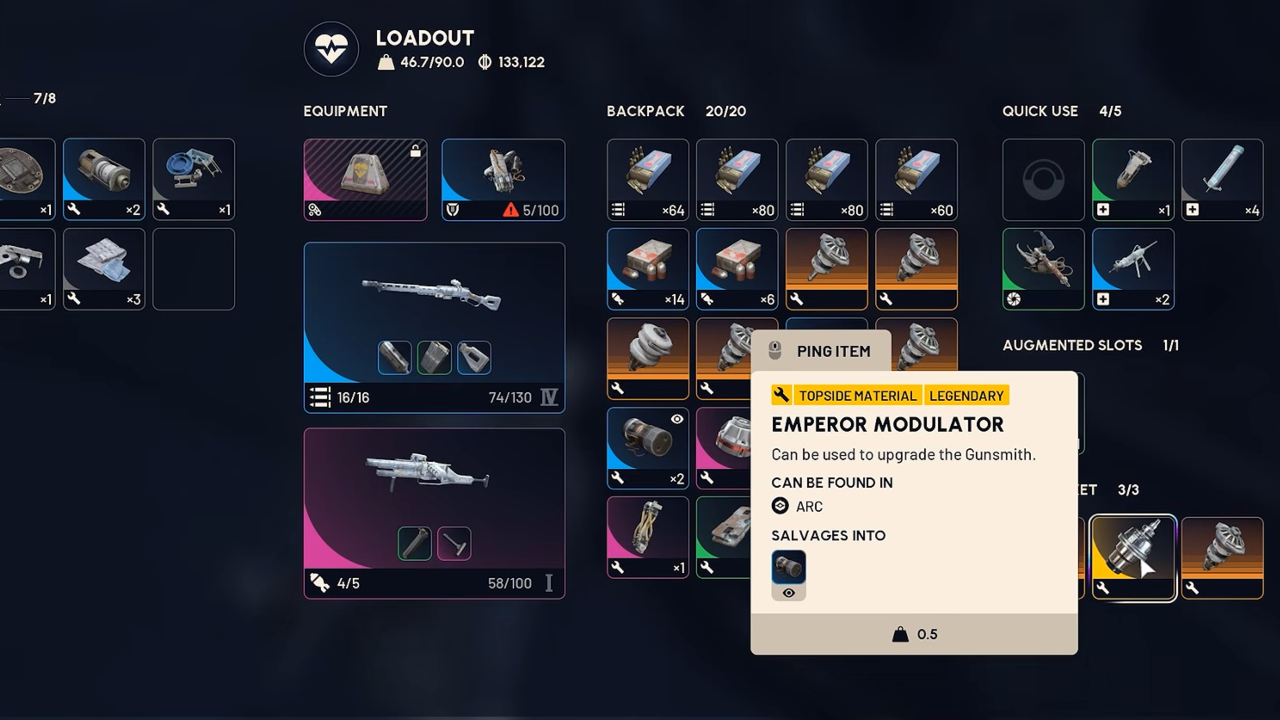
Amplification Modules work differently: each Mark matches a weapon rarity, so Mk. I and Mk. V are not interchangeable. Read our ARC Raiders Amplified Weapons Guide for the supported weapons and upgrade paths.
If you also need the Frigate Inductor for Research Station Level 4, that comes from a different activity. Our ARC Raiders Frigate Guide explains its loot and access route, while the Outpost Guide covers research facilities and progression.
BOOSTING FACTORY
Want the Emperor Loot Without the Dungeon Grind?
Our ARC Raiders Emperor Boost completes the dungeon puzzle event and collects its available cache rewards, including rare materials and resources.
View ARC Raiders Emperor Boost →
How to Escape the Emperor Dungeon Safely
Finding rare loot is only half the run. You still need to leave the Emperor and reach a valid extraction point. The final chamber provides routes back outside, including a main opening and side doors made accessible by the room mechanics.Before exiting, put your Emperor Modulator and highest-value Amplification Modules in safe pockets. Reload your weapons, recharge your shield, and check the remaining raid time. If the timer is short, stop looting ordinary ARC parts and move.
The Reckless Transceiver near the Fallen Emperor is one of the closest Ballistic Gondola extraction points. It can also be easy for other Raiders to watch, so approach through cover and listen before calling the gondola. If the nearby exit is contested, consider another available extraction instead of risking everything in a direct fight.
Extraction checklist:
- Place the Modulator and best Modules in safe pockets.
- Choose the closest safe exit before leaving the chamber.
- Check the map and raid timer.
- Heal before moving into open ground.
- Extract with the Ballistic Gondola and confirm the loot in your stash.
Can You Solo the Emperor Dungeon?
Yes, solo Emperor runs are possible. The biggest challenges are movement mistakes, dangerous ARC rooms, and losing time while learning the puzzles. A Snap Hook and a strong ARC weapon make solo attempts more manageable, even though neither removes the need to learn the hazards.For solo runs, prioritize reaching the final chamber over clearing every enemy and container. Save time by using cover against Hydras, learn the safe spots in the crusher and laser rooms, and keep enough healing for the trip outside.
A squad has more firepower, can cover different angles, and may revive a downed teammate. However, more players can attract attention, and everyone should know when to move during the timed hazards. Assign one player to watch for Hydra fire while another handles yellow nodes and traversal.
Common mistakes to avoid:
- Entering with too little time left in the raid.
- Forgetting a movement tool or running out of healing.
- Trying to sprint through stamina-draining gas.
- Standing beside an orange or red loot pod after breaching it.
- Leaving the final chamber before opening the extra wall caches.
- Carrying a Modulator in the regular backpack instead of a safe pocket.
ARC Raiders Emperor Dungeon FAQ
Do you need a key to enter the Fallen Emperor?
Yes. A locked entrance needs an Emperor Gateway Conduit. You can craft one with the blueprint and three ARC Couplers, or enter through a gateway another Raider has already unlocked.Can you still use throwables to bypass Emperor doors?
Patch 2.1.0 fixed unintended throwable interactions with some Emperor doors. Avoid relying on shortcuts shown in videos recorded before October 13, 2026; follow the normal puzzle sequence instead.Does Redirection need to be active to enter the Emperor?
No. Redirection is the main way to farm the Conduit blueprint and crafting materials. Once you have a key, you can take it to the Emperor during a later Pendola Pass raid.Is the Emperor Gateway Conduit consumed when used?
Yes. Unlocking the closed dungeon entrance uses the Conduit. If you plan to open it again in another raid, be ready to craft or obtain another key.Is the Emperor Modulator guaranteed from every run?
The Modulator is a known Fallen Emperor reward, but there is no verified public drop-rate guarantee for every individual run. Check the final wall caches and earlier special containers to improve your chances of finding one.Can you complete the Emperor dungeon solo?
Yes. Solo players can complete the dungeon, but the platforming and Hydra encounters demand careful movement. Bringing a Snap Hook, enough healing, and safe pockets is strongly recommended.Is the Emperor part of the ARC Frigate?
No. They are separate Frozen Trail activities. The Fallen Emperor is the crashed machine on Pendola Pass, while the Frigate is an airborne ARC vessel. Both can provide Amplification Modules, but their other important progression materials are different.Is the Belly of the Beast quest completed inside the Emperor?
Yes. Belly of the Beast sends you into the Fallen Emperor, where you must search the required containers and finish the quest objectives before leaving. Follow the quest counter during the run so you do not extract before completing the required searches.What is the difference between an Emperor Modulator and an Amplification Module?
The Emperor Modulator is a material for upgrading your Gunsmith to Level 4. Amplification Modules Mk. I–V are used for supported weapon upgrades after you unlock the necessary progression. They serve different purposes, so keep the items you need for both stages.The Fallen Emperor is worth learning because it brings together puzzle-solving, dangerous ARC encounters, and some of the most useful weapon-progression loot in Frozen Trail. Once you know each room's mechanics and protect the loot you find, repeat runs become much easier to manage.

Top 50
Get your Arc Raiders rewards now.